PRODUCT DEVELOPMENT
Measuring Systems: ATOS
Keywords: Reverse Engineering, Tool and Moldmaking, Quality Assurance, Ceramic Castings, CNC-Milling
Today modern, innovative companies use optical 3D measuring technology for faster construction of forming tools, for geometry and dimensional checks during first article inspection and to create backup copies of try-out tools
In the ceramic industry, capturing of the actual shape of a product is of utmost significance, as dry and firing shrinkage must be completely understood so that the related deformation during the production process can be compensated
Optical 3D Digitization System
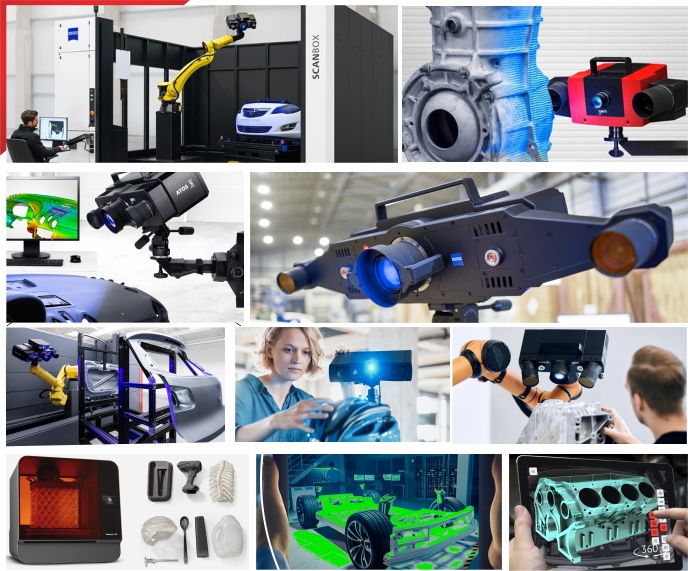
The ATOS 3D Digitizer is based on the principle of triangulation The sensor unit projects different fringe patterns onto the object to be measured These patterns are then recorded by two cameras Based on the optical image equations (calibration), the computer automatically calculates the 3D coordinates for each camera pixel of the scanned surfaces with very high precision Individual measurements are automatically transferred to a common object coordinate system using previously applied reference points During each measurement, the software checks online for system calibration, sensor movement or any ambient changes that might affect the measurement
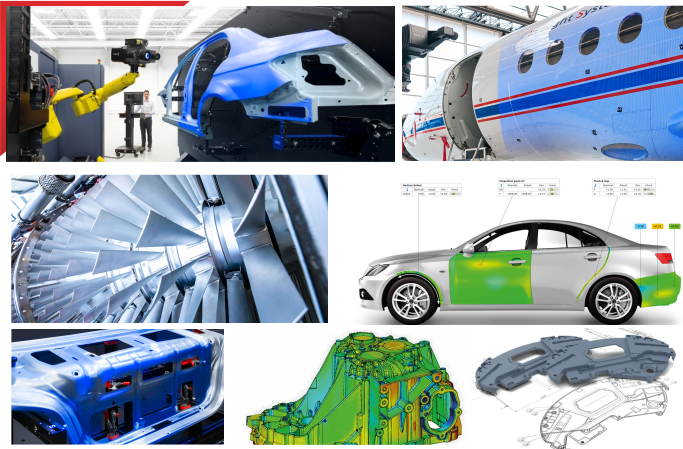
The ATOS sensor head can be positioned manually on a tripod and is, due to its robust design, built to perform also in harsh and adverse production environments The ATOS 3D optical digitizer is mobile and can easily be adapted to specific measuring tasks and object sizes within a few minutes by interchangeable lens sets Due to this flexibility, the ATOS system is able to measure objects of various sizes, from filigree injection-molding components to a complete aircraft Robots or multiple-axes motion units are available for automated measurement
Reverse Engineering / Design
Hand-made models, such as visualization models or oversized models, in which the contraction ratio has already been implemented, can be quickly scanned completely capturing all freeform surfaces using optical digitizing (Fig 1) The measured data is initially available as point cloud or polygon mesh which can subsequently be mirrored, inverted or scaled in the ATOS-Software
. Depending on the requirements eg for import into CAD-systems the ATOS measuring data can be reduced using curvature-based algorithms without any quality loss in order to minimize the data volume (Fig 3) In addition, any arbitrary sections, such as axes parallel, along radii or splines and basic primitives can be created and exported as IGES
For the actual surface reconstruction special software packages (eg RapidForm, Geomagic, Polyworks, Pointmaster, Icem-Surf, etc) are available where NURBS-surfaces can be constructed directly on the polygon mesh Thus, surfaces can be mathematically described whose conventional creation in normal CAD systems can be very time-consuming
Today, a number of CAD programs, such as Catia, ProE, etc, as well as tool and moldmaking systems, such as Tebis, Visi and Delcam can also import and effectively process the ATOS measuring data in their original data quality and native resolution Consequently, the designer can now work independently from the metrology engineer taking all necessary information for surface reconstruction from the high resolution scan data
Reverse Engineering / Moldmaking
When developing forming tools in the ceramics industry the appropriate dry and firing shrinkage for the corresponding materials being used must be taken into account Each contour of the form must be differently enlarged by a defined percentage (allowance) in order to obtain a product with the correct shape and size Not only is the material property vital for obtaining a suitable product, but also the geometry (shrinkage resistance) and, above all, a correct technical design
If the visualization model or the oversized model has been previously digitized, a smooth route into CAD/CAM is now possible The CAD data for models and forms can be derived by means of surface reconstruction of the scanned data (reverse engineering) using respective software packages
Quality Assurance / First Article Inspection
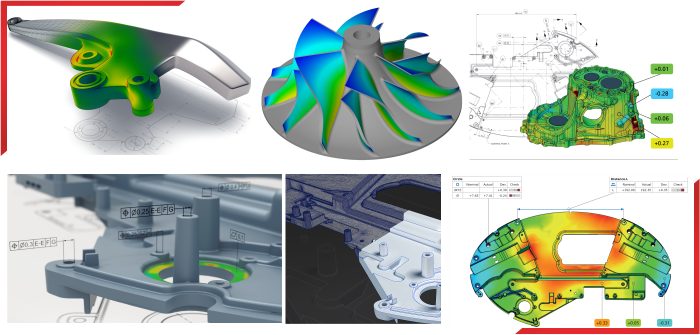
Capturing of the actual contour is of vital significance in tool and moldmaking, as properly fitting items come from "wrong" molds which compensate shrinkage and deformation during production process and de-molding For first article inspection and quality control, the ATOS measuring data of digitized components can be directly compared with the original measured data or CAD master data (Fig 9) Such a full-surface nominal/actual comparison can be used to quickly determine whether defined tolerance limits have been maintained, or to control which areas of a component have been deformed The measured data and the CAD model are therefore imported into the ATOS inspection software After the alignment to the CAD coordinate system (eg RPS registration, 3-2-1, Best-Fit), any deviation can be immediately visualized using a color plot of the entire component surface and easily and quickly interpreted (Fig 10) Defined points can be just as easily individually calculated according to the principle of conventional coordinate measuring machines (Fig 11) For documentation and further processing 3D reports or tables can be generated, and the results and deviations can be exported to various formats such as Excel, HTML, Word, 3D Viewer,
Reverse Engineering / Adaptation of Tools during Pilot Production
Based on the differences between CAD data and measurements of first samples derived from the forming tools, necessary modifications which may be required during pilot production can be completed efficiently Any manual modifications made during tool try-out or production startup phase can be immediately updated into the CAD model with the aid of ATOS-3D digitization and surface reconstruction In this phase, manual modified areas can be detected by means of a nominal/actual comparison between the CAD model and the actual component enabling the CAD to be modified to reflect the true form (Fig 13 - 16) This method guarantees that the actual status of the tool will constantly be recorded and is also available as a CAD data record for all CAD/CAM processes
This method guarantees that the actual status of the tool will constantly be recorded and is also available as a CAD data record for all CAD/CAM processes
Archiving / Product Variants
Digitization during pilot production also enables for permanent archiving of all various forms and process stages of a product This provides access to variants which might be no longer present (Fig 17) Meshes of the various model states can then be compared and areas may be combined This allows product variants and modified products to be created quickly and easily at any time ATOS 3D digitization of older tool and mold depots also permits classic products to be quickly adapted and refabricated
Tool Duplication using 3D Measuring Data / Digital Data Backup
In the ceramics industry the die for duplicating the forming tools represents a decisive factor Apart from adapting tools the ATOS 3D digitizer is also used at this stage of the process chain for a digital data backup of the functioning tools in case of loss or damage A lot of CNC programs and controllers can now generate and machine milling paths directly on digitized point clouds or meshes (Fig 18, 19) In this manner, broken dies can be duplicated quickly and easily even without having any previous surface reconstruction performed at all
Quality Assurance / Final Inspection for Production
With the use of macros, the ATOS 3D measurement system is also well-suited for use in final inspection of components
Based on a single measurement, the flatness of surfaces (Fig 21), angles, slopes, tap bank inclination, valve position, etc can be analyzed
© 2022. APM Technologies 3D Pvt Ltd
Copyright © 2022. All rights reserved


